Saturday, June 23, 2018

We're calling ourselves SPCG II

In November 2017, our landlord told us we could no longer use her land for our Spruce Park community garden (SPCG I).  For insurance reasons, she thought that the sooner we could be out of the space the better.  We bid farewell to our home of eight gardening years in early December.

Since then we’ve been casting about our neighborhood to find a new home.  Thanks to the generosity of another landowner in the neighborhood, we found a new location in mid-May and had our first garden work day in SPCG II today, 23 June 2018.  

During this month we’ve been moving our tools and supplies into our new home and developing a potential design for how we’ll use this space. 


It’s an interesting time to start a community garden - irrigation/sprinkler water and rain water are increasingly difficult to come by while the seasonal shifts we’re experiencing affect the success of planting fruits and vegetables when “we always did”.  Decreasing chill hours raise serious concerns about what fruit might be appropriate.  But we’re lucky to be able to think about it all and identify plants that we hope will have a high probability of success during these coming years of climate instability.


The earliest photos I have from the original garden members date from February 2010, when much work on soil preparation had already been completed.  The first garden was developed on compacted soils that had been used to dump construction debris and had most recently been used to park cars.  We are very fortunate that the soils in SPCG II, while still unamended native soils, do not suffer from the same kind of compaction and don’t seem to have much in the way of debris.  


By 2015, SPCG was a thriving garden with lush vegetation.  These two photographs were taken from approximately the same location.  The fruit trees, which had just been planted in 2010 (first image), had, by 2015 (second image), become large trees, bearing heavily, and (to our chagrin) a beacon to every peach beetle within five miles!  By the way, the fruit trees are barely visible along the clearly visible back fence in the 2010 image.  In the 2015 image, the fence is pretty much invisible behind the exuberant growth of the fruit and surrounding trees!


Our sign has been with us since 2010 and once we identify the perfect location, we’ll install it in our new garden … at a garden-warming party and open house!  


One thing that has changed over the intervening years is the addition to our gardening community of artist Aidan Ashley.  Aidan has recently become interested in drone technology and made the first aerial images of the garden today.  I’ll continue to document the development of the garden on the ground but Aidan’s imagery will give us all a bird’s-eye view of the garden as it evolves from a vacant lot into a community gardening space for Spruce Park.


Sunday, April 3, 2016

Spring is marching along and I'm struggling to keep up as we move into April!

I've been spending the past couple of weeks nurturing what I've put out so far.  The snow peas are about 6 inches tall.  I'm checking daily for flowers.  Not yet, but soon.  The lettuce in the shaded back row that I reported had not survived, in fact, did survive.  Being a red lettuce, I guess it just blended in with the dirt!

The clover planted in the row for the gardener who doesn't really have time to work her row this year is up.  The nice thing about the clover as a cover crop is that the gardener can interplant other vegetables with the clover or simply turn it under if she finds some time to work in her row.  Why clover?  It's a nitrogen fixer and is used as what's often called a green mulch.

The potatoes have lovely green plants showing, about 4 inches tall so we gently dusted them with straw just yesterday to encourage the green leaves to grow upwards and to give the roots the idea that they could spread out and have more baby potatoes....

As for what to plant now, we're just approaching the official average last day of frost in our area (15 April) so all cool season crops can be out from starts (it's too late really for seeds) and it's time to start thinking about some of the vegetables that can handle a bit of chill but not a frost.

One bold gardener has already put out her tomatoes, basil, and peppers!  Since she has been carefully covering the plants during our chilly evenings, they seem to be surviving nicely.  With any look (and persistent attention), she'll have a jump on the rest of us once the warm growing months officially start!

Sunday, March 20, 2016

The garden on 20 March 2016

According to the hardiness maps and the weather predictions, it's early in the growing season, too early for many plants.  However, just look around the garden (and your yard).  The fruit trees are all blossoming, and, in fact, some have moved on to start fruit already.

As for vegetables in the garden, chards and kales that overwintered are just about perfect at the moment.  With young leaves and close to freezing night temperatures, the greens are sweet and tender.  That will change, of course, as soon as it warms up, but it's a nice early season treat for those who have overwintered vegetables.

In my sunny row, I put in some lettuce starts (not very successful - I seem to do better starting from seed than putting in seedlings.)  The seeds I put out earlier - snow peas, spinach, radishes are all up and growing.  For the snow peas, at least, you could say that the clock is ticking - they won't survive the heat very well although I have managed to coax them along until May in the past.  But, as the season progresses, they have a tendancy to provide an early nosh for spider mites and powdery mildew.  So, vigilance becoming increasingly important.

In the shady row I share with another gardener, we put in brussels sprouts, broccoli, and lettuce.  Again, alas, no luck with the lettuce but I'll try yet again.  As for the brussels sprouts and broccoli, they're established but like the snow peas, it will be a race to see if we can bring them to proper eating status before they bolt or simply wilt from our heat.  The potatoes we put out earlier are coming up and it will soon be time to cover them lightly and loosely with some alfalfa to train them ever upward, hopefully, setting tubers along their stems as they reach for the sun.

Friday, March 4, 2016

What I planted today (4 March 2016)

My other garden row, which I share with one of our other gardeners, is in a completely different microclimate in the garden.  Very near the top of the slope that runs from west (high point) to east, this row is in shade much of the day - from evergreens to the north, deciduous trees (that get taller every year) to the south, and the fruit trees of the garden orchard to the west.

With this much shade, this part of the garden stays cooler and therefore has the possibility of retaining more moisture.  Of course, mulch anywhere helps with moisture retention, but limited direct sun also helps!  So, this row is perfect for cool season crops that often bolt before they finish growing in our generally short spring.

What's a cool season crop?  If you're planting from a seed packet, anything that says before last frost and/or soil temperatures over 40F.  Although the official last average frost for Albuquerque is mid-April, the garden is relatively protected by houses on two sides and a high fence on one side.  Soil temperature checks throughout the winter suggested our soils never really went below about 40 although neighbors a block away report the heaving that goes with freezing and thawing.  Never underestimate the power of a microclimate!  We're considered to be in hardiness zone 7 but that really is a general guideline.

So.  Today. we put out potatoes and onions.  As an experiment, we put the potatoes in a cage and we're going to add alfalfa as the season progresses.  The idea is that as the plants grow up, up gets further away.  So, rather than dig roots ever deeper into the soil, they should be making potatoes along the way as they reach for the sun.  I've read mixed reviews about the success of this method, so we'll see.

We were also able to get some seed starts for broccoli, brussels sprouts, and lettuce.  They'll spend a few days hardening off and then, out they go.  Both broccoli and brussels sprouts tend to have a hard time in our garden but I'm hopeful that with as much shade as I anticipate they'll have, they'll stay cool enough to develop properly.

Wednesday, March 2, 2016

What I've been planting in February and why

We struggle with gardening in a harsh climate.  Part of the struggle is that we want to grow vegetables that require extra effort but we don't always have the time to put in that effort.  Puebloan people have been 'dry farming' in the southwest for hundreds if not thousands of years.  Without the benefit of irrigation at the turn of a spigot.  Although admittedly closer to natural sources of water or in small areas sited for maximum benefit from whatever rainfall there was.  And without the benefit of soil tests and store-bought compost and mulch.  Which is all to say that we can be productive gardeners here.

I want to describe some of my strategies over the course of the season.

In our community garden, I have a row near the front of the garden.  Evergreens and deciduous trees provide some shade on the north end of my row in the morning but for most of the day, my row 'bakes' in the New Mexico sun.  Depending on what the gardeners in the row east of me grow, I might have some or even too much shade from their plants.  I have no control on what happens or even what to expect since we don't determine jointly what we'll grow.  The garden is sloped and my row is closer to the bottom of the slope than the top but far up enough that heavy rains tend to roll right off (even if I have my row well mulched.)  I have put up about a 6 inch 'retaining wall' which helps hold in surface water but any water under the ground will, of couse, carry on on its way downhill to the river.

As I write this on 2 March, the weather is a balmy spring day.  In fickle New Mexico, this doesn't mean winter is over and we can still expect some frosts and even snow.  Still, it's past time to plant snow peas.  I put out snow peas three separate times:  Late January (up about a week ago), early February (up about a day ago), and mid-February (up any moment now, I suspect!)

Why peas?  Well, mostly because I like them.  But also because they fix nitrogen.  This will improve my soil naturally for whatever I plant later this year.

And, a note, I did not have peas last year in the interests of crop rotation.  Crop rotation, even in a small space such as our community garden is helpful for two reasons:  1)  Viruses and bacteria and some bugs will winter over in the soil.  If their host plant isn't available, their populations can be substantially reduced, if not eliminated; 2) plants use particular nutrients and can deplete them locally in the soil.  Of course, if you want to plant the same vegetable year after year, you can fertilize to ensure appropriate nutrients for particular plants.

As scientists' understanding of soil increases, it is becoming increasingly clear that the soil is a living organism (or at least filled with teaming, thriving communities of organisms) and is best left alone.  This is good news for us who did not get the double digging and heavy tilling genes.  Leaving the soil generally alone, you can poke your finger into the ground to the depth appropriate to plant your seeds and put them in their own holes.  And, all in all, the living organisms in the soil are happier with what you might think of as a home cooked meal - compost (the latest thought is partially finished so they can help too!), manure, and mulch.  There certainly is still a place for chemical fertilizer on occasion but more when the soil is being prepared initially or there's some deadline that requires fast growth and production.  At the Master Gardeners we heard of the case where a football field had been denuded of grass and had to be reseeded and grown in six weeks.  But back to my peas.  I poked little holes about 2 inches deep and dropped the seeds in.  I tamped the earth very gently.

Other seeds I've put out during these late winter months include root vegetables:  radish, carrots, parsnips, and turnips.  And some greens:  spinach and chard.  I've tried starting lettuces in seed trays at home and just put them out this week.  They're a bit more sensitive than the other vegetables I've mentioned although they also are a cool season crop.  As quickly as it heats up here, lettuces will often bolt before they've formed nice heads.  I have to confess, I don't think I've been very successful with this first attempt but we'll see.  If nothing else, gardening is a continual experiment!

Wednesday, July 29, 2015

Tasting in the Garden: July 2015

No images specific to the Tasting this time as my camera is becoming crotchety in its old age.  It now seems to think autofocus is for wimps.

And we had a smaller, more intimate group at the July Tasting compared to the June one.  So many of our gardeners have different commitments and responsibilities … and take such interesting trips.  Perhaps we'll have to start adding in posts about Travels from the Garden.

One of our gardeners was sure as many as 90% of the garden was there but this person is a the glass is at least half full sort of individual.  The nice thing about a small group is that you really do get a chance to talk with everyone.  One of our members was recently in New York at a world sustainability vision conference and is still excited about the possibilities.  I love hearing about that experience and the energy that can come about from people working together for the good of the planet and all living beings.

As for food, which of course is always central to our Tastings, we enjoyed some freshly roasted and salted kale.  I must confess that I'm not always a kale fan and the kale chips you can buy in the store I … well, let's just say that I'm happy to leave them in the store.  But these, ah these kale "chips" were crisp yet just melted in your mouth.  I'm very sorry that I don't have a photograph of this plate to show you although no photograph could do the taste justice.  Actually, I'm sorry I don't have photographs of all the dishes.

We also had a secret recipe gazpacho loaded with produce from the garden and highlighting some of the recently harvested garlic from this gardener's row.  Our first tomatoes also put in an appearance in this dish, I believe.

In other garlic offerings, we had a sort of baked fritter with herbs and garlic: chives, thyme, tarragon.  Although a store-bought sweet potato was the basis of the fritter, if it were only a month or two later, that could also easily have come from the garden.

And I brought a chilled soup made with borage leaves and decorated with borage flowers.  That soup featured buttermilk (no, we don't have a cow and no plans to go there… yet) and a cucumber.  No cucumbers in the garden this year due to our surfeit of squash bugs but hopefully we'll be back to them next year.

Our meal was rounded out with homemade peanut and chocolate blondies.  As we savored the sweetness of our dessert, we wondered whether we should try to grow peanuts next year.  And, with our fruit ripening, we were able to enjoy freshly harvested grapes.  The peaches and nectarines are yet to come although the peach beetles are patrolling the trees every day now.  Soon.


Saturday, July 4, 2015

First Tasting in the Garden of 2015

Some thought it was too early.  The spring vegetables are but a dream now - lettuce, peas, spinach have long since wilted in the intensity of the summer sun and heat.  The summer vegetables, most notably tomatoes, peppers, eggplants are just beginning to set their fruit.  So, what to eat that comes from our rows at this transition point in the gardening year….
Clockwise:  Salsa with garden garlic,
herb muffins, plum compote.

Well, as the photos here demonstrate, we had plenty!  It is true that many dishes were supplemented with store-bought goods (after all, we don't grow wheat and mill our own flour to make pasta… yet) and some of the offerings relied on preserved harvests from 2014, but gardeners from 10 of our 17 gardened rows came through with a wide and creative variety of tasty snacks that we all enjoyed.

The bite-sized herb muffins made use of lavender, thyme, and chives from the garden.  They were delicious on their own but were served with cream cheese (when will we get a cow???) and a bit of plum compote, preserved from our bumper crop of Santa Rosas in 2014.


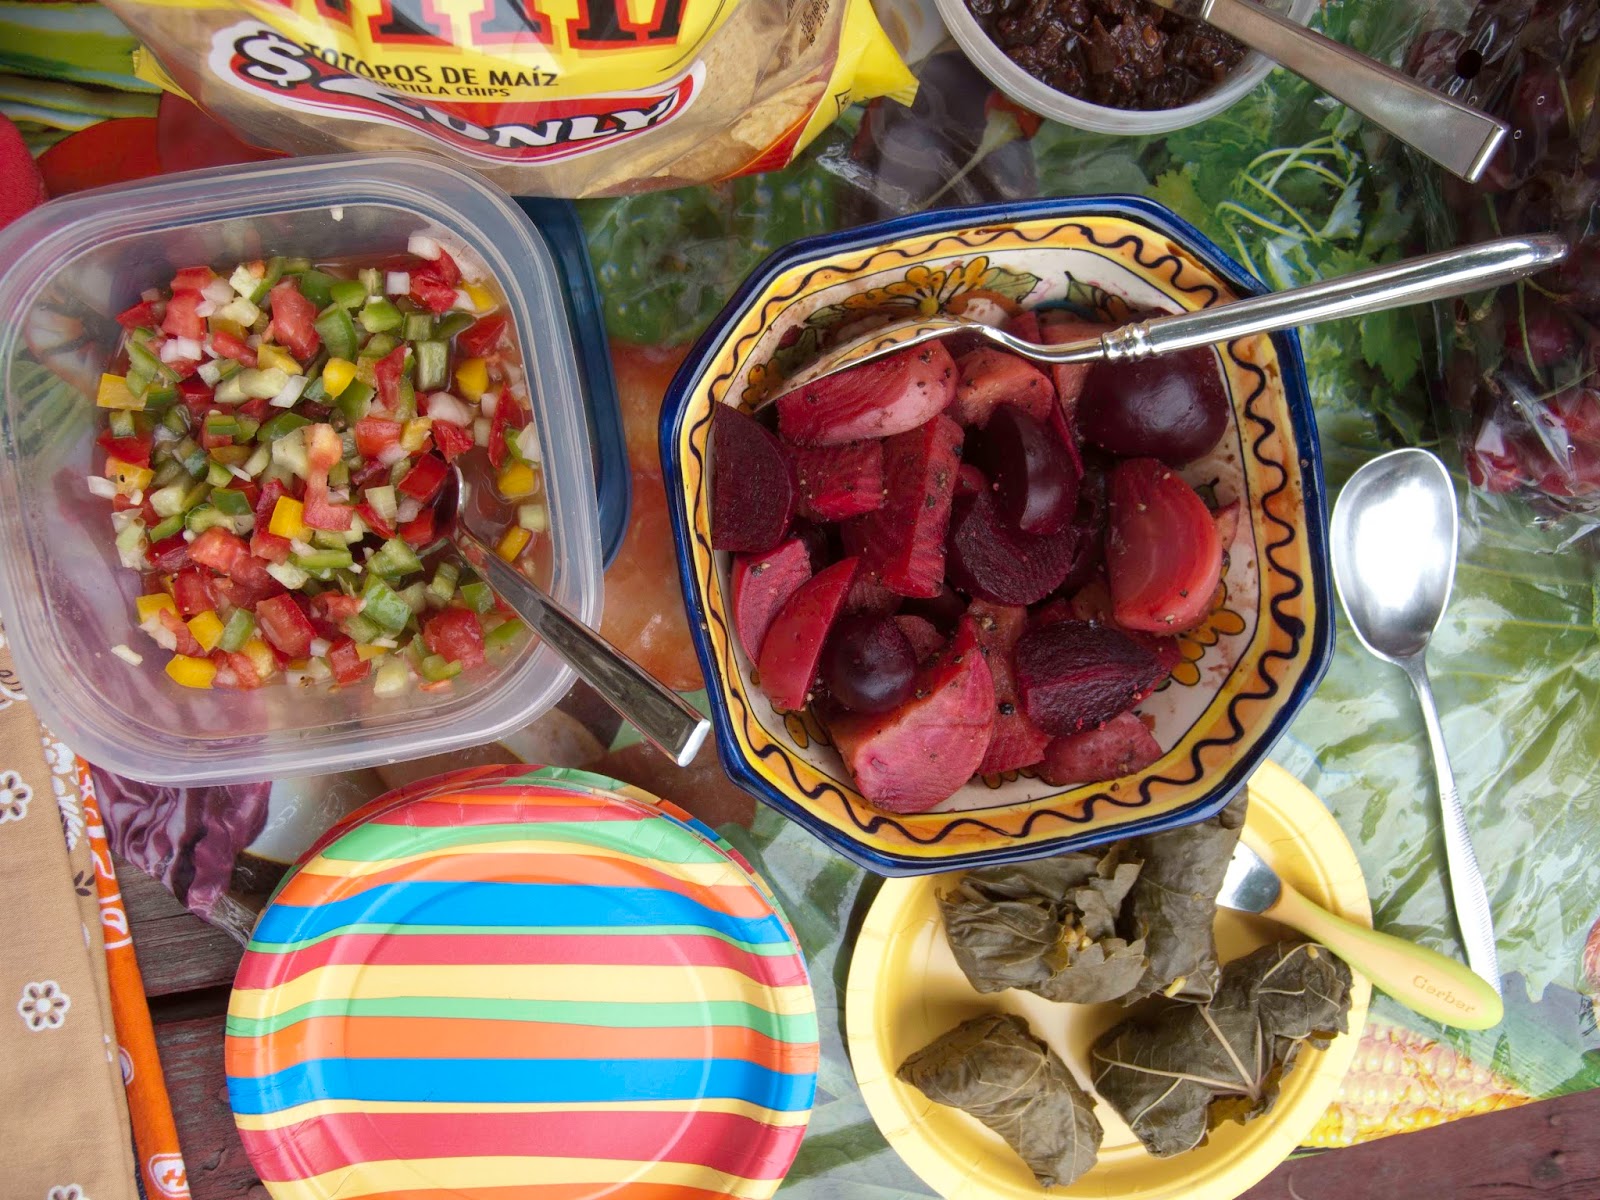
A medly of beets, dolmas made with
garden grape leaves, another view of
our yummy salsa.
Beets planted earlier in the year are just approaching harvest.  The beet dish included tender young beets from one gardener's row supplemented with large beets - red and golden - from the store.  A head-on photograph shows all the deliciousness of the homemade salsa, the most exciting (and hot) feature of which was some of the first garlic of the year from the garden.  The official harvest date is in July but many of our gardeners (myself included) have harvested the garlic from our own rows already.

This Tasting was the debut for an exciting new use of something that has been in the garden since its founding days in 2009.  Garden grape leaves were used to make dolmas.  I've forgotten all the ingredients in those tasty treats but I believe some of the herbs came from our herb row - perhaps some mint from the garden as well…

Clockwise:  melon lassi, roasted new potatoes, fresh
Santa Rosa plums, young beet pasta, another glimpse
of the dolmas and of the beet medley, nectarine chutney,
and Washington State sweet cherries.
The melon coconut lassi (no we don't have a coconut tree… yet) in the blender container is based on frozen melon (from last year's harvest - a sad reminder that we will not have melon this year due to an abundance of squash bugs … too bad they're too stinky even to consider eating…) with coconut water and coconut milk.  In addition to the recommended spices of cinnamon, cardamom, and cloves, this drink was flavored with garden basil.  Mint would probably be good in it as well.

What could be better than roasted new potatoes harvested from the garden that very day?  Why, those very same potatoes roasted with garden sage and rosemary!  And that's exactly what we had.  While the dish was not as colorful as some of the other offerings, the taste was heavenly.

Our Santa Rosa plum crop was a bit sparse this year compared to last year (apparently not an uncommon occurence when the fruit isn't thinned - we'll be working to even out our harvests in coming years) and did ripen all at once.  One of our orchardists picked that wonderful fruit and brought it to the Tasting for everyone to enjoy.

The beet pasta was a beautiful melange of baby beets and beet greens harvested by one of our gardeners.  The photograph above shows it before we all delved into it, destroying the lovely presentation with the gleaming white garnish of feta cheese.

Nearly hidden to the right of the paper towels is a
pitcher of rosemary lemonade.  The lower right corner
shows a spritely and crunchy slaw.
A refreshing lemonade prepared by our youngest gardener (with the help of her mother) featured rosemary from the garden.  No, we don't have a lemon tree although one of our gardeners does at her home.  I am quite jealous.  So, perhaps we need to consider a greenhouse…

And, last to be described, but only because something has to be last, was the celery and fennel slaw.  I will confess that I have forgotten all the ingredients but they were all light green and refreshing.  Lime juice.  When we get the greenhouse…  Fennel fronds and mint from the garden.

A feast to the love we all have of gardening and good company!

Tuesday, May 5, 2015

Garlic through the seasons in Albuquerque


In general, garlic will grow best in a highly composted, well-drained soil.  Given our usual New Mexico soils, that means amendments.  An organic compost is best.  Garlic also is said to like full sun but dappled light is probably fine or full sun part of the day here where full sun is pretty brutal.

Late summer, early fall:  Seed garlic will start becoming available.  Read up on the different types to decide what you’d like to try and buy your seed.  If you buy organic garlic in the grocery store, you can separate the cloves off the head, retaining some of the roots on the bottom (don’t remove the paper) and plant them.  If you’re planning to plant from cooking garlic, save the best and biggest cloves for the garden.

Fall:  In October, as late as Halloween, plant your cloves.  At the time you plant, or perhaps a few days before, add a substantial layer of compost if the soil needs amendments.  One person I know dumps in a few inches of horse manure and plants directly in that.

Cloves should be planted flat, root side down and pointed tip up.  The cloves should be planted at least 2 inches deep.  The cloves should be planted about 6 inches apart.

Winter:  Keep the soil moist but not wet until the ground temperatures drop to or near freezing - in theory in mid-December.  At this time, put the garlic to bed with a deep layer of mulch (4 - 6 inches).

Spring:  As the green leaves begin appearing it is important to keep the soil evenly moist to ensure good bulb development.  One source says that garlic needs an inch of water per week.  This is also the time to do a foliar spray of dilute liquid fish emulsion.  
Late spring:  No fertilizing should be done after mid-May.  At this point, fertilizer will encourage the plant to develop lovely green leaves but actually you want a beautiful full root.

Summer:  As the leaves begin to yellow, limit watering so the bulbs won’t rot.  Keep the area weeded so the garlic won’t have to compete for nutrients.

At some point, scapes may appear.  A scape is the stem that holds the flower.  In general, scapes happen with hardneck but not so much with softneck varieties.  The scape needs to be cut off above the last leaf.  One article says that bulb production can be reduced by up to 30% in poor soil as the plant shifts its energy into the flower.  Scapes are good to eat with a mild garlicky flavor, so don’t just toss them into the compost pile.

In late June or early July, when there are only five green leaves, the garlic is ready to harvest.

Harvest:  Dig the bulbs out carefully - they are very fragile and will bruise easily until cured.  Brush the dirt off but leave on the roots and leaves.  The garlic should either be laid out or hung in a well-ventilated area out of direct sun.   It takes another one to two months for the garlic to cure properly.  Although you can eat green garlic if you can’t wait!


Sources:  The information here was taken from the following articles as well as personal experience and conversations with fellow garlic gardeners.

An interesting blog focused on the Santa Fe community but with valuable information for us here in Albuquerque.

A good general reference on growing garlic.  There’s a good basic description of differences between hard and soft neck garlic varieties.  It’s particularly valuable, I think, for its links out to garlic sources.

This article from Seed Savers Exchange is a succinct but complete checklist (well, bulleted points) for growing and harvesting garlic.  Better yet, you can order at least a dozen different varieties of organic seed garlic. 

Garlic plant illustration
The two illustration links given above are further referenced back to this site.
Source: Sterling, S. January 2000. Garlic. www.dpi.vic.gov.au.  Note that this link goes to a home page.  I was not able to find the actual article cited.

Last reviewed, updated, and links checked:  4 June 2015.

Sunday, February 15, 2015

How can there be bugs already?

Just today, 15 February 2015, which should by rights be winter, I saw cabbage white butterflies cruising the garden looking for a snack and who knows what else (a mate, a place to lay eggs...).  I've also seen a lady bug and our usual contingent of grey aphids that have wintered over on the collards.  So, whether we believe it's spring yet or not, the insect world is shifting into gear.

Cabbage White

Wikipedia, the source of all information, has an entry on this butterfly, also known as the small white (Pieris rapae).

In terms of what concerns us, the butterfly lays her eggs on the underside of Brassicaceae (aka mustards, crucifers, cabbages.)  This would mean that anyone with wintered over collards or arugula in the garden should be checking for eggs regularly.  Also, anyone who has recently planted seedlings of kale, cabbage, broccoli, collards, Brussels sprouts, etc should definitely be on the watch.  According to the Wikipedia link given above (quoting an assortment of scientific articles), the butterflies prefer depositing eggs on isolated plants or on perimeter plants in clusters of plants.  They apparently are also aware of the voracious appetites of the caterpillars and lay few rather than many eggs (see below) per leaf although I also saw some imagery on the internet with large clusters of eggs.

Image by Alpsdake, downloaded from Wikipedia
I'm not sure of the scale but this miniature corn cob is actually quite small.  You could either just be suspicious of any bright yellow dots that are longer than wide on the underside of your leaves or take your magnifying glass.  (Lady bugs also lay yellow eggs but appear to be smooth, not corn-cob ridged - more below.)

If you see the eggs/larvae, the first line of defense is squishing.  It appears that soapy water with something spicy - garlic or a hot pepper - will also do serious damage to the larval membrane and/or render the leaves unpalatable to the newly hatched caterpillars.

From my admittedly limited reading, it appears that pesticides aren't particularly effective but there are two strategies that can be implemented to protect your tender plant leaves from being identified as potential nurseries.

First.  These butterflies are apparently quite territorial so you can either buy or make small white butterfly shapes and hang them in your row.  It's best if they are hung so that they will "flutter in the breeze."  I saw one youtube video in which they hung bits of tin foil with the same effect - a breeze appears to be important here as well.

Second.  A sacrificial plant.  Nasturtiums are considered ideal for this, although personally it makes me rather sad as I'm fond of nasturtiums.  But you could plant something that looks rather like a stockaded fort with nasturtiums as the stockade.  You do still have to watch for the caterpillars as they can decimate a nasturtium for a midmorning snack and be looking around for the next meal.  But it does give you a bit of a jump on the caterpillars.

A third option, which we haven't really explored in the garden, is consciously and deliberately to develop a predator population.  This would include some of the wasps and assassin bugs.  I believe there are probably some birds as well who would be delighted to snack on the butterflies and perhaps the caterpillars.

There is, as usual, a final option, which is not to plant anything they want to eat.  This is actually not realistic for several reasons, not the least of which is that we would run out of things to plant!  But, more importantly, the butterflies range over kilometers in a day so unless the entire city participated in a Brassicaceae ban....

Aphids...

The aphids I'm seeing at the moment are a blue-grey carpet in the heart of my collards.  A determined attack with soapy water will bring them under control in short order (I hope... it did last year and the year before but you never know.)  If you haven't done the soapy water thing before, just put a few drops of regular kitchen dish soap (Palmolive seems to be more effective than the 'organic' kinds I buy at the Coop...) with a couple drops of garlic oil (also available at the Coop and probably other places - I think you can also use chili powder or something hot and unpleasant to the skin)... Put the soap and oil in a spray bottle filled with plain water.  The whole thing shouldn't be particularly sudsy when you shake it or feel soapy on your hands.

Lady Bugs...

Like the last fairy at Sleeping Beauty's christening gone awry, it's always a relief to know we have lady bugs in the garden.  This link (click here) goes to a slightly rambling six minute video showing lady bug eggs that are just beginning to hatch on the side of a pot.  While you probably don't need to pay attention for all six minutes. it is a good source for seeing eggs (yellow ones and a whitish-pink set) and for seeing a newly hatched larva.  A somewhat longer (30 minutes) and much more professionally put together video - produced by the BBC is, not surprisingly, much more complete.  Replete with images of ladybugs mating, laying eggs, growing through their various stages, and eating their prey, the video could easily have an 'explicit content' warning.  It does make fascinating viewing though so click here if you're interested in watching.

Friday, January 30, 2015

It doesn't look like spring to me...

At mid-January 2014, some of our gardeners had snow peas (planted the previous fall) coming up.  So, at mid-January 2015, I convinced my long-suffering gardening partner that it was time to plant cool season crops.  Really.

Because he's a good sport, he came out with me and we planted snow peas, sugar snap peas, shelling peas, spinach, broccoli (for his dogs), broccoli rabe, lettuce, chard, kale, and carrots.  It's been over a week with two brief snows and NO plants have come up yet.  I hope I wasn't wrong about this!

So, there's one day left in January but I looked at the Down to Earth calendar for January, thinking that it's never to late to learn what I should have been doing.  They say that January is the coldest month in New Mexico.  It certainly felt like that yesterday.  Low nighttime temperatures in the low 20s.  Check.  Daytime highs in the upper 40s.  Hah!  We've beaten that quite a few times and even reached the low 60s once or twice I think.  They don't think it's actually time to put out vegetables or too much of anything else.  They do recommend getting your tools cleaned, oiled, and sharpened...  What was that expression - gentlemen, start your engines...

More seriously, germinating seeds care more about soil temperature than air temperature.  Although they will care about air temperature once they poke their leaves above the ground.  If you read your seed packets, many will provide information on the required soil temperature and/or the weeks prior to or post frosts.  All of the seeds we planted are what are called cool season crops.  They tend to be able to go out around a month before the last frost and/or when the soil temperatures are above 40F.  Our soil temperatures have been holding pretty steady all winter at about 50F.

The concern, really, with planting this early is when the leaves are up.  These particular vegetables can all stand a bit of frost but it will be necessary for me to keep an eye on any night freezes we have coming up and cover the row for the night if necessary.  To me, that's a small price to pay to have early vegetables!

Surely it's not fall already... or what to plant for your fall and winter garden

Another repost from the previous blog but good for every fall...

Of course not. But it is time to think about planting late summer vegetables. We generally have enough time to get in a quick round of some of the fast growing cool season crops before the soil chills too much and the frosts are too hard.

The Albuquerque Master Gardener's book, Down to Earth, is available online. Or at least the calendar is.

For August, they recommend planting vegetables like "lettuce, spinach, radishes, carrots, onions, broccoli, snow peas, and turnips for harvest before Christmas." And to think I just pulled out my last snow pea today. Guess I'll be starting over in short order!

As late as September, they suggest that you can put out arugula, chard, garlic, fava beans, and leeks as well as the vegetables listed for planting in August. Planting in September should get you an early spring harvest.

As I recall, some of our gardeners put out garlic even later.

If you're planting seeds for a harvest BEFORE it's too cold, check the seed packet for the days to germination and the days to maturity. Different varieties of the same vegetable may have quite different days to maturity.

According to the Master Gardener website, the official average first frost at the Sunport is on Halloween. As they go on to point out, the average is not the actual. Even if the temperatures dip for a night or two, our garden is relatively protected and you can cover plants for some protection.

So, if you wanted to grow a vegetable that germinated in a week and matured in 45 days, you'd want to plant about one and 3/4 months BEFORE 31 October or in early September. Planting too soon risks having your seedlings fry in a heat they don't like. On the other hand, plants being pretty smart about that sort of thing, you might find that even if you plant a bit early, the germination will be slow.

Planting vegetables in the fall to get a jump on spring gardening is very tempting. I should know. I now seem to have perennial collards in my row. And the gardeners of row 13, as I recall, had snow pea plants poking out of the ground in mid-January this year. How cool is that?

On the other hand, giving back to the soil by putting in a cover crop that can be cut and mulched in the spring is a good thing to do. As is simply giving your row a nice thick blanket of mulch and compost for the winter.

No squash in 2015 because we didn't squish the squash bugs in 2014....

This post is copied in from our previous blog and was originally posted on 9 August 2014.  We won't have any squash, melons, or cucumbers in 2015 although we will plant one sentinel/sacrificial squash to determine the extent of our problems for this season.


Many people refuse to grow squash because the squash bugs always win.  I have now lost winter squash two years running to these ... ehmmm.... pests.  People in the garden with me can always tell when I've found a new set by the profanities I mutter.  I'm not a fan of squash bugs and, truthfully, for our community garden, I think we need to have a bit of a break from squash.  I wouldn't go so far as to say the bugs have won but they've certainly woRn me down.

I don't know why but they seem especially fond of winter squash.  I don't think any of our gardeners had summer squash this year so perhaps they were forced to eat winter squash.  But last year (2013), there was a spectacular zucchini with a healthy population of squash bugs that produced prolifically anyway.  The squash, I mean, although the bugs probably reproduced prolifically as well.  "Squash bugs, paaahhh!", that plant seemed to say, with a defiant toss of its head.

But this year (2014)... We have only winter squash.  And, we didn't have a 'bug patrol.'  Everyone, I think, knows what the eggs look like.  And the adults.  But, here's what a totally destroyed plant looks like.  Each LEAF sported on the order of 50 or more bugs.  It was a sad and sobering sight.  As I sprayed soapy water on the bugs they dropped to the ground and hurried off.  They know me now and I can't get close to them any more - they scurry from one to the other side of the leaf - it's rather like playing hide and seek... with pretty high stakes for them.  I suspect that soapy water has somewhere between limited and no effect on the adults but I'm hoping it kills the nymphs...  I don't like to think that I'm a rabid bug hater and go around killing bugs indiscriminately but our squash bugs appear to have no predators who can keep up with their exploding population other than, well, me.

The worst part, though, was watching the bugs disperse through the mulch, knowing that they can (and no doubt will) winter over and be ready for any squash that we might dare to plant next spring.  I sadly watched about twenty of them burrow under the mulch to find a new, safer home for the winter.  I hope we'll be ready next spring!

First 2014 "Tasting in the Garden" (originally posted on 26 July 2014)


Where to start...  Adjectives would be wonderful, fabulous, awesome ... and could only become more superlative from there.
About 10 rows were represented in the feast.
We had a lovely flat bean reminiscent of an Italian flat bean but Spanish.  Two different types of chard wraps - one filled with mozzarella cheese, basil and tomatoes and roasted on the grill; one stuffed with rice, sushi style.  We harvested a pineapple tomato and sliced it.  It was large enough that everyone had a good sized and delicious sample.  Although I have tons of collards in my row, I didn't prepare anything from them but luckily someone from another row prepared a most tasty dish.  There was a rhubarb crumble, beet salad, whitefish spread (not from the garden but maybe we could have a pond next year????) served with basil and cherry tomatoes from the garden.  Grilled, smoked sausage, Jalapeno poppers wrapped in bacon.  (Bacon and sausage also not from the garden .... maybe we should just have a farm...) Quinoa salad with mango.  Although the quinoa wasn't from the garden, one row has some nearing harvest and we're all looking forward to tasting some home-grown soon.  Fresh grapes.  And the samplers I made and brought: a feta-herb dip, an unripe stone fruit chutney, and a plum compote.  And dried tomatoes from 2013.  I'm sure I've forgotten something.

It was a veritable feast as well as an amazing demonstration of what can be done with simple garden produce.

Wednesday, January 28, 2015

Plant rotation in the community garden


A caveat, of course, to begin.  This post (which is copied in here from the former blog at my website) focuses on a specific, small area of a particular community garden.  The topic of plant/crop rotation is often found in farming, not community gardening, literature.  And, there are those who would argue that this is way beyond overkill for our garden.  So, if you don't belong to this latter group, then forge ahead, intrepid reader...

Many rotation plans call for three year cycling: year 1 plant, years 2 and 3 fallow to that crop, year 4 plant.  I think this does a lot towards getting rid of pests for that specific crop/crop family.  I imagine that during year 1 the pest moves in and sets up housekeeping big time (if you're not using pesticides).  The pest 'overwinters' in any form from egg to adult and is ready to go come spring and your tender new plants.  But, you have wisely fooled that pest by not providing luxury accommodations in year 2...  Still, a hungry pest will generally make do with what it can find and might survive well enough to overwinter yet again albeit with a smaller population for the spring of year 3...  And now, the famine is serious, and the pest effectively dies out.  Or at least moves on to someone else's garden...  And so, in year 4, you can begin the cycle again.

The happy scenario I have imagined above (which theoretically gets you a good harvest of a particular crop family every 3 years) doesn't address the extent to which a crop has to be removed.  I don't know the answer because a lot of what I've read refers to crops and fields so the plant would be completely gone during the intervening years.  In the smaller garden space where crop diversification is the rule (especially with 20 or so gardeners on about an eighth of an acre), I suspect that the 'infestations' are not likely to be of the magnitude seen in acres of field planted in a single variety of one plant.

And, I don't know how far is far enough for a hungry pest.  Is 'further down the row a piece' or 'the row next door' far enough, or does there need to be an intervening row (or two or three) maybe with some specific plant the pest really hates in there?  I don't know but our experience with squash bugs this year does suggest that the pest situation can get out of control relatively quickly.  The bugs reproduced themselves with discouraging success, moved widely throughout the garden when their host plants were removed, and were willing to settle for cucumbers and melons when squash were unavailable.

Thus far I've focused on above-ground pests, largely because we've had so many this year.  But there are other benefits to plant rotation.  The rest of this post summarizes the information provided in an article I found online.  (Click on the word article in the previous sentence to go to the link - it should appear as a purple underlined text but you never know...)

This article cites (without references but I’m sure they can be found relatively easily) a number of studies of crop rotation suggesting that productivity falls off rapidly when the same crop is planted in successive years. One factor is the ‘nitrogen fixing’ (which is really about mycorrhizal fungi) and another factor is disruption of pests and other pathogens.  And the article mentions other things that just seem weird to me.  Like both snap beans and potatoes should be planted following corn to improve production.

Although the research is for farms, the article argues that even when pulling up plants in a home garden at the end of the season, we never can get all the roots so that pests and pathogens will remain.  Thus, even small scale ‘crops’ can benefit from rotation.  I've addressed above-ground pests extensively because you can see them and so you know what the problem is when your plant is unhappy.  I don't really know anything about the fungal diseases and viruses that always seem to mysteriously discolor, wilt and dry plants.  But the pathogen will often remain in the soil in an anthropomorphic way similar to the one I imagined for the bugs.  So, I think the same sort of temporal and spacial rotation scenario can be imagined.  The only difference I can think of would be that the fungal diseases really are going to be more localized than pests that can sort of 'vote with their feet' (i.e., move).


With the fungal diseases, though, the question of disposal of the diseased plant becomes important.  The material should be carefully removed and never, never, never put in the compost...  Think CDC and infectious diseases for your plants.

The article also provides an 8-crop rotation plan as well as a listing of nine ‘families’ to help rotate among different families and not merely different plants, some of which might have the same or similar susceptibilities.


Monday, October 13, 2014

A season in summary - 2014

With the cooling weather of autumn, the garden is winding down from our sixth growing season.  Three new households joined the garden this year and, at this time, we are recruiting new members for the 2015 growing season.  If you’re interested, contact us at:  SPGardenInfo@gmail.com.  

We now have a blog which is open to the general public.  Our posts include brief summaries of organic gardening information with links to more detailed information, recipes, and reports of our social Tastings in the Garden, work day efforts, and Potlucks with a dash of business meeting.  Feel free to visit us at:  SPCommunityGarden.blogspot.com.


The weather this year conspired to give us bountiful harvests of fruit, grapes, and a wide variety of vegetables.  The bountiful food also brought bountiful bugs.  Smelly squash bugs are no one’s friend but the lovely turquoise green shield bugs passed through without excessive damage.  The iridescent green scarab beetles, on the other hand, while beautiful, would have happily eaten their way through all our fruit without some diligent attention.  Now is the time to be on the lookout for the grubs that will become those bugs next summer.

The colorful zinnias and sunflowers in the first row add a bright note to the garden and have become a visible reminder of the beauty of a garden for all who walk or drive down Cedar.  Even though the traditional summer vegetable garden is winding down for the fall and winter now, we are planting vegetables that can withstand our relatively mild winters:  now is the time to put out chard, kale, spinach, lettuce, and other greens.  It’s a bit late for winter harvest now (August/September would have been the ideal time to get those plants started) but it’s still possible to get them growing so that they’ll be ready to produce abundantly come spring.  Some of the root vegetables will winter over, especially the slow-maturing ones like parsnips.  And, it’s nearly time to plant garlic.  Truly, the garden year never ends!

In the words of our gardeners

I like being in the garden because I enjoy the connection that comes from growing the food that I eat and that I feed to my family. I like the fact that the food is organic and very local. It has also been a good way to get to know my neighbors.

One of the cornerstones of our garden philosophy is growing organic.  Many’s the time that it is so tempting to bring out the pesticides, especially when the bugs seem to be eating all our produce.  But the time and attention required by an organic garden lead to a connection to land, food, family, and neighbors.

When I was going through chemo for appendiceal cancer, it was wonderful therapy to work in the soil.  I have also learned so much from my gardening neighbors about plants, and soil prep, and composting, and orchards.  It's a great place to learn if you are just starting out like I was 3 years ago.

I enjoy the garden for the friendship and the camaraderie.  I love the beauty of our garden with the colors, textures and delicious results!

Our garden is not all work and food production.  Members often work in their own rows quietly and alone to experience the peace and respite that come from working the soil.  The garden attracts a range of birds and butterflies that are amazing and beautiful.  At the other end of the social spectrum, the garden is also a place for friendly gatherings.  Throughout the summer we have Tastings in the Garden where we meet and share food prepared from the fruits and vegetables we’re harvesting at the moment.  These strictly social afternoons or evenings give us an opportunity to visit without thinking about the business of working a garden, to enjoy the fruits of our labors.
This year we've been saving seeds to help the Bosque Seed Collective develop hyper-local varieties such as beans, tomatoes, arugula, and chard.  I hadn't realized the challenge that comes from having to grow them longer than you would normally. Seeds are expensive because they take work and extra space to grow!

The garden is an evolving experience and members make suggestions for new projects each year.  This year we started a community herb row with favorites such as tarragon, basil, parsley, onion and garlic chives, thyme, oregano, and rosemary.  We also participated in the Bosque Seed Collective project and contributed collard, arugula, and bean seed,s among others, to the effort.  Some of the collards have been planted by our members for a fall/winter harvest and are rapidly growing now.

And, in conclusion, the following quote from one of our founding gardeners really summarizes all that is good about our garden:

4 Reasons Why I Really Love Being a Member of the Spruce Park Neighborhood Garden  
1  The community it has built
2  The gardening knowledge that has been shared
3  The 2 block walk down an alley to the garden where I savor its beauty and then 
     see what it offers for that evening's dinner
4  The occasional evening group tastings around the garden picnic table where members offer delicious dishes made from garden produce:  melon lassi, roasted Roma tomatoes, stuffed peppers, parsnip fries, salsas, casseroles, gazpacho, plum cobbler, ice cream...oh my!

Monday, September 29, 2014

Tasting in the Garden: Focus on Tomatoes!

Sunday evening we met in the garden for a Tasting showcasing our tomatoes and continuing to experience and taste our melons.  So much bounty and generosity from nature, from our gardeners, and from the man who provides our tomato plants to us each spring... Bob.  His wife confided that he plays classical music for them and touches each plant every day while he is nurturing them in preparation for planting in the garden.  I don't think I have ever seen healthier tomato plants anywhere and now I know the secret to providing strong young plants for gardeners.  Perhaps we should consider a stereo system for the garden????


But the food...  where all the energy in our plants ends up.  It was spectacular as always.  What a wonderful group of cooks we have in our community.  Starting from one end of the groaning table to the other we had:  stuffed tomatoes, dried tomatoes on mozzarella toasts, the gracefully aging unripened nectarine chutney and Santa Rosa plum compote, a medley of tomatoes, peaches, peppers, and who knows what else (cook's secret!) in a salsa/chutney, melons freshly harvested from the garden, oven roasted parsnip 'fries', a gratin of potatoes with kale (for recipe, click HERE), oven roasted Roma tomatoes, fresh cherry tomatoes with roasted Shishito peppers, savory tomato pie, blue Italian plum cobbler, fresh pesto and baguette, a sweet tomato sorbet that didn't harden (for recipe, click HERE - but either the tomatoes need to cook down a bit more or someone ... that would be me... didn't leave the ice cream maker freezer base in the freezer long enough), and melon lassi (recipe link available through the melon blog post).

I could probably go on for pages about the specific taste delights of each recipe but instead I'll simply remind you that a picture is worth a thousand words so here is a novella.

Yellow tomatoes cooking down for the sorbet

Stuffed tomatoes & dried tomatoes on mozzarella toast.

Oven-roasted parsnip 'fries' and fresh melon
Fresh tomatoes with Shishito peppers;
oven-roasted Romas

Potato and kale gratin
Blue Italian plum cobbler 


Pesto made from garden basil 


A late breaking addition, we harvested one of our ripening pomegranates.  In a way, those bitter sweet seeds summarize what's best about our Tastings.  Not only do we enjoy the fruits of our labor through the dishes we prepare at home but we also often turn directly to the garden and harvest something to eat fresh, in the moment.  Sometimes it's a freshly concocted salsa.  Sometimes it's fruit warm from the summer sun on the trees.  And sometimes it's one of our abundant and ever-volunteering melons.  But, I still haven't talked anyone into trying some of our ever-present bugs...


Although the days are getting cooler and the plants are yielding their last for this season, our Tastings will transmute into the winter potlucks of our business meetings.  The socializing and the enjoyment of good food that make our garden a community garden will continue year round, as always.


Links last checked on 29 September 2014.


Friday, September 26, 2014

Tending the soil with winter crops

Winter crops are planted to replenish and rest the soil in between growing seasons.  Sometimes called ‘green manure’, these cover crops can also be planted between crop rotations during a (long) growing season.  The plants function to add organic materials to the soil, particularly nitrogen, and to loosen and aerate the soil. As you might imagine, these cover crops need to be removed from the row before they go to seed, and several weeks before the bed is replanted (to allow time for breakdown of any plant matter left in the row.)

Turning under the cover crop can be done several ways. First, the plants are cut close to soil level. You can then save the cuttings for the compost or set them aside for use  as mulch once you have finished preparing the bed.

The remaining stubble can then be chopped and turned under.

For gardeners who follow a no-till system, the vegetable seeds can simply be planted in between the stubble. The new seedling roots will break down the cover crop root clumps over time.

If planting between the stubble doesn't work for you, a slightly more elaborate no-till method is to smother the stubble.  To do this, the row is first mulched (a good use for the plants you just cut!) and then covered with the gardener's friend, black plastic.  (According to the source blog - link below - you can even skip cutting the crop to the soil line and go straight for the smother.)

Allow at least two or three weeks for the black plastic to work its magic before you plant the vegetable seeds.

Some ideas for the cover crop are given below and are taken directly from the source material.

Hardy legumes

These nitrogen-fixing crops provide a fertilizer as well as organic matter. Planted in fall, they grow slowly until late winter when growth speeds up. Legume crops may not mature until May in some regions. Cut down these cover crops in spring before they go to flower, then till them under.

Hairy vetch (Vicia villosa): Grows to 2 feet high; hardy to -15° F. Hairy vetch is considered the hardiest annual legume. Vetch tolerates poor soil, and matures late. Sow 1 to 2 pounds per 1,000 square feet.

Field pea (Pisum arvense and P. sativus): Grows 6 inches to several feet tall. Field peas are hardy to 10 to 20°F. ‘Austrian Winter’ pea is low growing and late maturing. ‘Magnus’ grows to 5 feet. Sow 2 to 4 pounds per 1,000 square feet.

Berseem clover (Trifolium alexandrinum): Grows 1 to 2 feet high. Berseem clover is hardy to 20° F. Produces high amounts of nitrogen. Sow 2 pounds per 1,000 square feet.
Crimson clover (T. incarnatum): Grows 18 inches high, and is hardy to 10° F. Crimson clover matures late and fixes less nitrogen than other clovers. Sow 1/2 to 2 pounds per 1,000 square feet.  If allowed to go to seed, Crimson clover can become an invasive weed.

Grasses

Cover crops from the grass family grow quickly, tolerate cold, and improve the structure of compacted soils. Thickly sown grasses add increased organic matter in comparison to legumes.
Grasses also control erosion which is a real benefit in wet regions. Grasses do not have the benefit of fixing nitrogen as legumes do. Annual grass cover crops are cut down or mowed in spring before seeds set, and then tilled under.

Annual ryegrass (Lolium multiflorum): Grows 2 to 3 feet high; hardy to -20° F. Fastgrowing and tolerates flooding. The seeds are inexpensive, and the grass is very hardy. Ryegrass can become weedy. Sow 1/2 to 2 pounds per 1,000 square feet.

Winter rye (Secale cereale): Grows 4 to 5 feet tall; hardy to -30° F. Best grass for cold winter climates: tolerant of low fertility, acidic soils. Sow 2 to 3 pounds per 1,000 square feet.

Oats (Avena sativa): Grows 2 to 3 feet tall: hardy to 10 to 20° F. Produces the least organic matter of grasses, but is tolerant of wet soils. Oats usually succumb to winterkill, but the residue is still beneficial to the soil. Sow 2 pounds per 1,000 square feet.

Barley (Hordeum vulgare): Grows 2 to 3 feet tall; hardy 0 to 10° F. Fast maturing and tolerant of dry and saline soils: intolerant of acidic soil. Sow 2 to 3 pounds per 1,000 square feet.

A common mix offered by seed companies is hairy vetch and annual rye. The vetch fixes atmospheric nitrogen, while the rye uses leftover nitrogen. Nitrogen from the decomposing vetch will cause the rye to decompose more quickly and not tie up nitrogen as long.

To plant cover crops, sow seeds at least 30 days before the first expected fall frost date in your growing region. For cover crops that are only marginally hardy in your area, push back the sowing date to 60 days before the first frost. The more established a cover crop is before winter the more likely it will overwinter successfully.

The information for this post came from two posts of a single blog:

Click HERE for more information on the basics of winter crops to plant and why.

Click HERE for more information on turning winter crops under.

Wednesday, September 17, 2014

Melons in the garden

On the 12th, we had a Tasting in the Garden featuring different preparation methods for some of the volunteer melons we have in the garden.  When you're harvesting five or six pound mystery melons every few days, you reach a point where melons for breakfast just doesn't sound fun any more.

The volunteers come from a variety of sources:  seeds dropped in the garden either from fruit rotting on the vine, or from previous year tastings, or from garden-grown or bought melon that composted incompletely.  Too many volunteers of anything is a sign that your compost didn't get hot enough...

Many of the volunteers are bland-tasting.  And many experienced gardeners will shake their heads solemnly and tell you that it's the result of cross-pollination, generally with a cucumber.  The plants, you see, all belong to the cucurbit family, which includes squash, gourds, melons, and cucumbers.

While it is completely true that squash bugs, in a pinch, will migrate among the vines quite nicely, cross-pollination is a different matter.  As it happens, cross-pollination will only occur within a species of the family.  Bottom line for melon growers:  cross-pollination will only occur between other melons and Armenian cucumbers.  And the fruit will only be affected if the cross-pollinated melon seed is planted the next year.

Two succinct descriptions may be found at the Iowa State University Extension and Outreach Program
(click HERE)
and at Walter Reeve's website (click HERE).
And, if you believe Google, there are another 26,000 possible articles on the topic of melon cross-pollination so you certainly don't have to take my word for it!

So, if it isn't cross-pollination, what is it that makes a melon bland?  According to the Iowa State article, it's usually unfavorable weather or soil conditions.

And, if you're now looking at 20 pounds or so of bland melons (or even five pounds), what can you do with them?

The Huffington Post had already done much of the legwork for finding non-sliced-melon-for-breakfast recipes.  If you want to see the full range of recipes to which they provided links, click HERE.

Melon bruschetta

Melon and peach salad
Melon agua fresca

Melon ice cream


Among other delights we sampled at our tasting were a melon bruschetta with pancetta and mozzarella.  And of course, lots of that garden staple - basil.  Because the melon would make the bread soggy, we served it in a bowl with the toasted bread on the side.  The melon and peach salad also featured peaches from our orchard mixed with mozzarella and basil.  Both recipes used balsamic vinegar.  Although I do think it's cheating, I reduced my balsamic vinegar to a rich, thick syrup rather than buying a $200 bottle.  Just saying.

We also sampled a melon lassi and an agua fresca, both of which were taste treats.

And finally, the piece de resistance, ice cream.  Made on the spot in one of those little hand cranked machines.  All you have to do is remember to freeze the bowl overnight and you can have fresh, home-made ice cream whenever you want.

Links checked 17 September 2014.