No images specific to the Tasting this time as my camera is becoming crotchety in its old age. It now seems to think autofocus is for wimps.
And we had a smaller, more intimate group at the July Tasting compared to the June one. So many of our gardeners have different commitments and responsibilities … and take such interesting trips. Perhaps we'll have to start adding in posts about Travels from the Garden.
One of our gardeners was sure as many as 90% of the garden was there but this person is a the glass is at least half full sort of individual. The nice thing about a small group is that you really do get a chance to talk with everyone. One of our members was recently in New York at a world sustainability vision conference and is still excited about the possibilities. I love hearing about that experience and the energy that can come about from people working together for the good of the planet and all living beings.
As for food, which of course is always central to our Tastings, we enjoyed some freshly roasted and salted kale. I must confess that I'm not always a kale fan and the kale chips you can buy in the store I … well, let's just say that I'm happy to leave them in the store. But these, ah these kale "chips" were crisp yet just melted in your mouth. I'm very sorry that I don't have a photograph of this plate to show you although no photograph could do the taste justice. Actually, I'm sorry I don't have photographs of all the dishes.
We also had a secret recipe gazpacho loaded with produce from the garden and highlighting some of the recently harvested garlic from this gardener's row. Our first tomatoes also put in an appearance in this dish, I believe.
In other garlic offerings, we had a sort of baked fritter with herbs and garlic: chives, thyme, tarragon. Although a store-bought sweet potato was the basis of the fritter, if it were only a month or two later, that could also easily have come from the garden.
And I brought a chilled soup made with borage leaves and decorated with borage flowers. That soup featured buttermilk (no, we don't have a cow and no plans to go there… yet) and a cucumber. No cucumbers in the garden this year due to our surfeit of squash bugs but hopefully we'll be back to them next year.
Our meal was rounded out with homemade peanut and chocolate blondies. As we savored the sweetness of our dessert, we wondered whether we should try to grow peanuts next year. And, with our fruit ripening, we were able to enjoy freshly harvested grapes. The peaches and nectarines are yet to come although the peach beetles are patrolling the trees every day now. Soon.
Wednesday, July 29, 2015
Saturday, July 4, 2015
First Tasting in the Garden of 2015
Some thought it was too early. The spring vegetables are but a dream now - lettuce, peas, spinach have long since wilted in the intensity of the summer sun and heat. The summer vegetables, most notably tomatoes, peppers, eggplants are just beginning to set their fruit. So, what to eat that comes from our rows at this transition point in the gardening year….
Well, as the photos here demonstrate, we had plenty! It is true that many dishes were supplemented with store-bought goods (after all, we don't grow wheat and mill our own flour to make pasta… yet) and some of the offerings relied on preserved harvests from 2014, but gardeners from 10 of our 17 gardened rows came through with a wide and creative variety of tasty snacks that we all enjoyed.
The bite-sized herb muffins made use of lavender, thyme, and chives from the garden. They were delicious on their own but were served with cream cheese (when will we get a cow???) and a bit of plum compote, preserved from our bumper crop of Santa Rosas in 2014.
Beets planted earlier in the year are just approaching harvest. The beet dish included tender young beets from one gardener's row supplemented with large beets - red and golden - from the store. A head-on photograph shows all the deliciousness of the homemade salsa, the most exciting (and hot) feature of which was some of the first garlic of the year from the garden. The official harvest date is in July but many of our gardeners (myself included) have harvested the garlic from our own rows already.
This Tasting was the debut for an exciting new use of something that has been in the garden since its founding days in 2009. Garden grape leaves were used to make dolmas. I've forgotten all the ingredients in those tasty treats but I believe some of the herbs came from our herb row - perhaps some mint from the garden as well…
The melon coconut lassi (no we don't have a coconut tree… yet) in the blender container is based on frozen melon (from last year's harvest - a sad reminder that we will not have melon this year due to an abundance of squash bugs … too bad they're too stinky even to consider eating…) with coconut water and coconut milk. In addition to the recommended spices of cinnamon, cardamom, and cloves, this drink was flavored with garden basil. Mint would probably be good in it as well.
What could be better than roasted new potatoes harvested from the garden that very day? Why, those very same potatoes roasted with garden sage and rosemary! And that's exactly what we had. While the dish was not as colorful as some of the other offerings, the taste was heavenly.
Our Santa Rosa plum crop was a bit sparse this year compared to last year (apparently not an uncommon occurence when the fruit isn't thinned - we'll be working to even out our harvests in coming years) and did ripen all at once. One of our orchardists picked that wonderful fruit and brought it to the Tasting for everyone to enjoy.
The beet pasta was a beautiful melange of baby beets and beet greens harvested by one of our gardeners. The photograph above shows it before we all delved into it, destroying the lovely presentation with the gleaming white garnish of feta cheese.
A refreshing lemonade prepared by our youngest gardener (with the help of her mother) featured rosemary from the garden. No, we don't have a lemon tree although one of our gardeners does at her home. I am quite jealous. So, perhaps we need to consider a greenhouse…
And, last to be described, but only because something has to be last, was the celery and fennel slaw. I will confess that I have forgotten all the ingredients but they were all light green and refreshing. Lime juice. When we get the greenhouse… Fennel fronds and mint from the garden.
A feast to the love we all have of gardening and good company!
 |
| Clockwise: Salsa with garden garlic, herb muffins, plum compote. |
Well, as the photos here demonstrate, we had plenty! It is true that many dishes were supplemented with store-bought goods (after all, we don't grow wheat and mill our own flour to make pasta… yet) and some of the offerings relied on preserved harvests from 2014, but gardeners from 10 of our 17 gardened rows came through with a wide and creative variety of tasty snacks that we all enjoyed.
The bite-sized herb muffins made use of lavender, thyme, and chives from the garden. They were delicious on their own but were served with cream cheese (when will we get a cow???) and a bit of plum compote, preserved from our bumper crop of Santa Rosas in 2014.
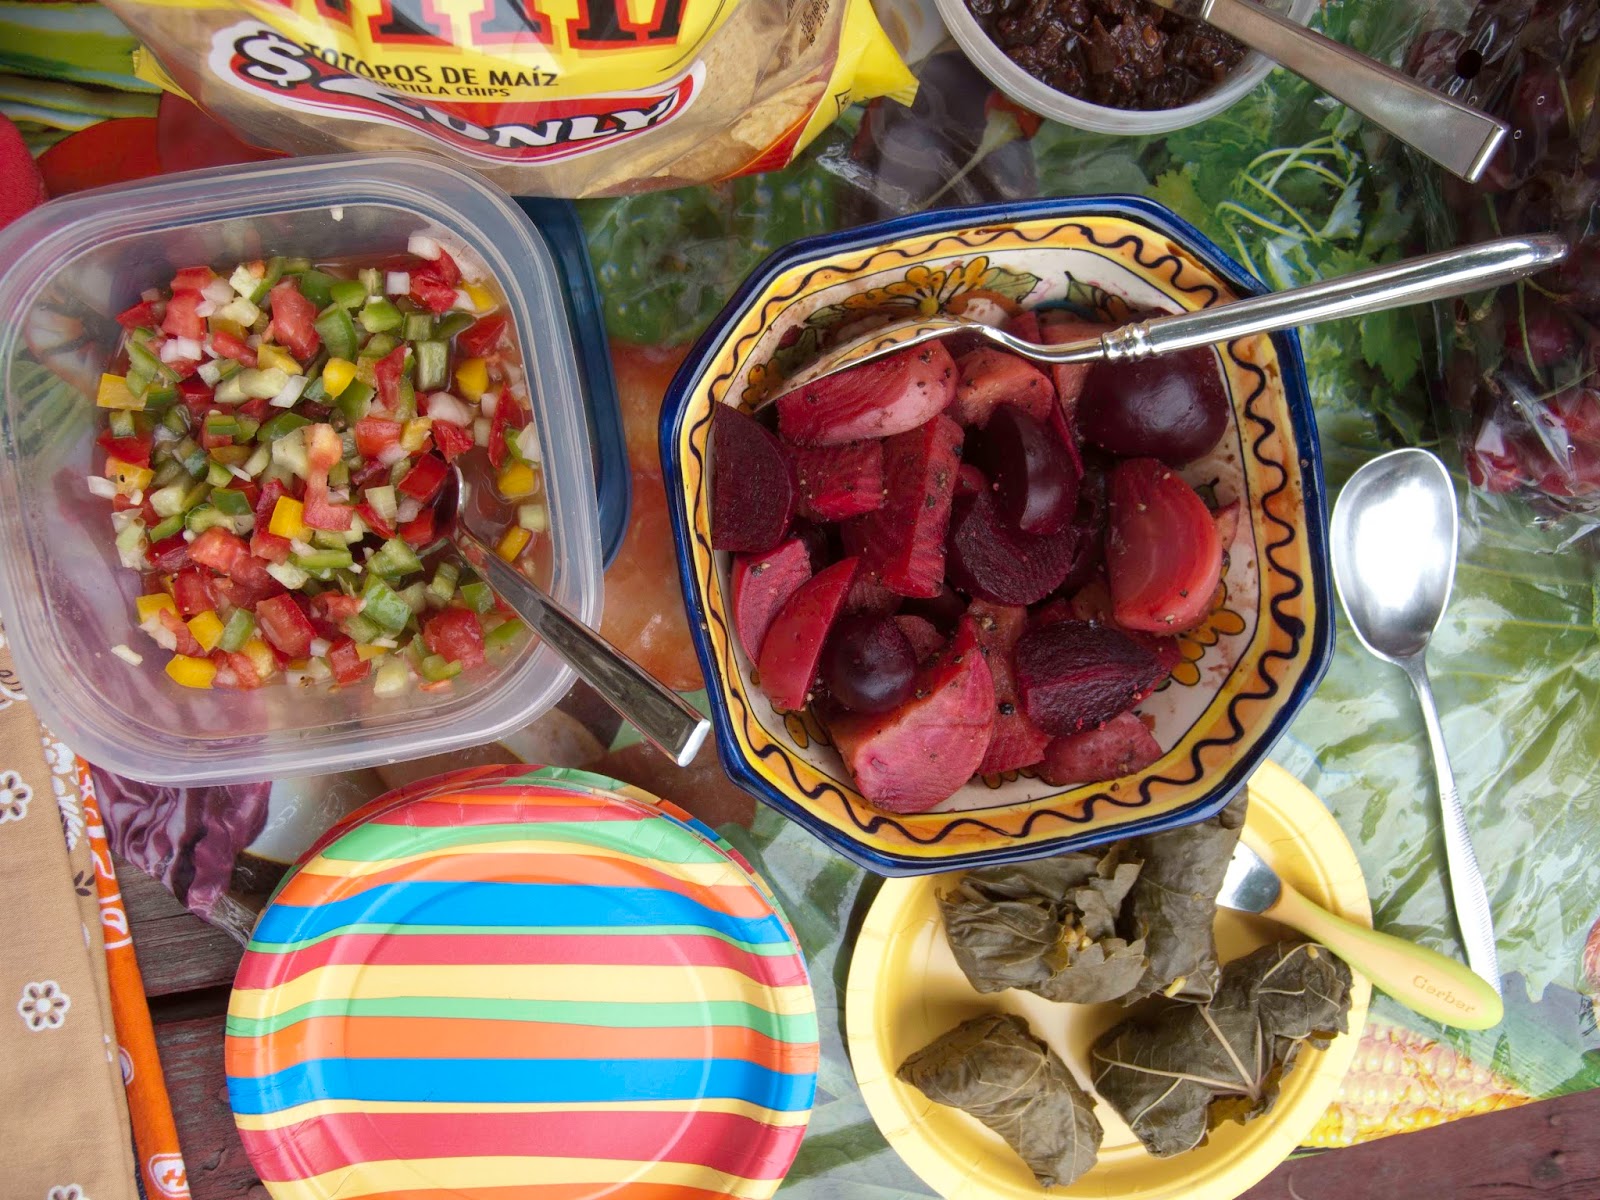 |
| A medly of beets, dolmas made with garden grape leaves, another view of our yummy salsa. |
This Tasting was the debut for an exciting new use of something that has been in the garden since its founding days in 2009. Garden grape leaves were used to make dolmas. I've forgotten all the ingredients in those tasty treats but I believe some of the herbs came from our herb row - perhaps some mint from the garden as well…
 |
| Clockwise: melon lassi, roasted new potatoes, fresh Santa Rosa plums, young beet pasta, another glimpse of the dolmas and of the beet medley, nectarine chutney, and Washington State sweet cherries. |
What could be better than roasted new potatoes harvested from the garden that very day? Why, those very same potatoes roasted with garden sage and rosemary! And that's exactly what we had. While the dish was not as colorful as some of the other offerings, the taste was heavenly.
Our Santa Rosa plum crop was a bit sparse this year compared to last year (apparently not an uncommon occurence when the fruit isn't thinned - we'll be working to even out our harvests in coming years) and did ripen all at once. One of our orchardists picked that wonderful fruit and brought it to the Tasting for everyone to enjoy.
The beet pasta was a beautiful melange of baby beets and beet greens harvested by one of our gardeners. The photograph above shows it before we all delved into it, destroying the lovely presentation with the gleaming white garnish of feta cheese.
 |
| Nearly hidden to the right of the paper towels is a pitcher of rosemary lemonade. The lower right corner shows a spritely and crunchy slaw. |
And, last to be described, but only because something has to be last, was the celery and fennel slaw. I will confess that I have forgotten all the ingredients but they were all light green and refreshing. Lime juice. When we get the greenhouse… Fennel fronds and mint from the garden.
A feast to the love we all have of gardening and good company!
Tuesday, May 5, 2015
Garlic through the seasons in Albuquerque

In general, garlic will grow best in a highly composted, well-drained soil. Given our usual New Mexico soils, that means amendments. An organic compost is best. Garlic also is said to like full sun but dappled light is probably fine or full sun part of the day here where full sun is pretty brutal.
Late summer, early fall: Seed garlic will start becoming available. Read up on the different types to decide what you’d like to try and buy your seed. If you buy organic garlic in the grocery store, you can separate the cloves off the head, retaining some of the roots on the bottom (don’t remove the paper) and plant them. If you’re planning to plant from cooking garlic, save the best and biggest cloves for the garden.
Fall: In October, as late as Halloween, plant your cloves. At the time you plant, or perhaps a few days before, add a substantial layer of compost if the soil needs amendments. One person I know dumps in a few inches of horse manure and plants directly in that.
Cloves should be planted flat, root side down and pointed tip up. The cloves should be planted at least 2 inches deep. The cloves should be planted about 6 inches apart.
Winter: Keep the soil moist but not wet until the ground temperatures drop to or near freezing - in theory in mid-December. At this time, put the garlic to bed with a deep layer of mulch (4 - 6 inches).
Spring: As the green leaves begin appearing it is important to keep the soil evenly moist to ensure good bulb development. One source says that garlic needs an inch of water per week. This is also the time to do a foliar spray of dilute liquid fish emulsion.

Late spring: No fertilizing should be done after mid-May. At this point, fertilizer will encourage the plant to develop lovely green leaves but actually you want a beautiful full root.
Summer: As the leaves begin to yellow, limit watering so the bulbs won’t rot. Keep the area weeded so the garlic won’t have to compete for nutrients.
At some point, scapes may appear. A scape is the stem that holds the flower. In general, scapes happen with hardneck but not so much with softneck varieties. The scape needs to be cut off above the last leaf. One article says that bulb production can be reduced by up to 30% in poor soil as the plant shifts its energy into the flower. Scapes are good to eat with a mild garlicky flavor, so don’t just toss them into the compost pile.
In late June or early July, when there are only five green leaves, the garlic is ready to harvest.
Harvest: Dig the bulbs out carefully - they are very fragile and will bruise easily until cured. Brush the dirt off but leave on the roots and leaves. The garlic should either be laid out or hung in a well-ventilated area out of direct sun. It takes another one to two months for the garlic to cure properly. Although you can eat green garlic if you can’t wait!
Sources: The information here was taken from the following articles as well as personal experience and conversations with fellow garlic gardeners.
An interesting blog focused on the Santa Fe community but with valuable information for us here in Albuquerque.
A good general reference on growing garlic. There’s a good basic description of differences between hard and soft neck garlic varieties. It’s particularly valuable, I think, for its links out to garlic sources.
This article from Seed Savers Exchange is a succinct but complete checklist (well, bulleted points) for growing and harvesting garlic. Better yet, you can order at least a dozen different varieties of organic seed garlic.
Garlic plant illustration
The two illustration links given above are further referenced back to this site.
Source: Sterling, S. January 2000. Garlic. www.dpi.vic.gov.au. Note that this link goes to a home page. I was not able to find the actual article cited.
Last reviewed, updated, and links checked: 4 June 2015.
Last reviewed, updated, and links checked: 4 June 2015.
Sunday, February 15, 2015
How can there be bugs already?
Just today, 15 February 2015, which should by rights be winter, I saw cabbage white butterflies cruising the garden looking for a snack and who knows what else (a mate, a place to lay eggs...). I've also seen a lady bug and our usual contingent of grey aphids that have wintered over on the collards. So, whether we believe it's spring yet or not, the insect world is shifting into gear.
Cabbage White
Wikipedia, the source of all information, has an entry on this butterfly, also known as the small white (Pieris rapae).
In terms of what concerns us, the butterfly lays her eggs on the underside of Brassicaceae (aka mustards, crucifers, cabbages.) This would mean that anyone with wintered over collards or arugula in the garden should be checking for eggs regularly. Also, anyone who has recently planted seedlings of kale, cabbage, broccoli, collards, Brussels sprouts, etc should definitely be on the watch. According to the Wikipedia link given above (quoting an assortment of scientific articles), the butterflies prefer depositing eggs on isolated plants or on perimeter plants in clusters of plants. They apparently are also aware of the voracious appetites of the caterpillars and lay few rather than many eggs (see below) per leaf although I also saw some imagery on the internet with large clusters of eggs.
I'm not sure of the scale but this miniature corn cob is actually quite small. You could either just be suspicious of any bright yellow dots that are longer than wide on the underside of your leaves or take your magnifying glass. (Lady bugs also lay yellow eggs but appear to be smooth, not corn-cob ridged - more below.)
If you see the eggs/larvae, the first line of defense is squishing. It appears that soapy water with something spicy - garlic or a hot pepper - will also do serious damage to the larval membrane and/or render the leaves unpalatable to the newly hatched caterpillars.
From my admittedly limited reading, it appears that pesticides aren't particularly effective but there are two strategies that can be implemented to protect your tender plant leaves from being identified as potential nurseries.
First. These butterflies are apparently quite territorial so you can either buy or make small white butterfly shapes and hang them in your row. It's best if they are hung so that they will "flutter in the breeze." I saw one youtube video in which they hung bits of tin foil with the same effect - a breeze appears to be important here as well.
Second. A sacrificial plant. Nasturtiums are considered ideal for this, although personally it makes me rather sad as I'm fond of nasturtiums. But you could plant something that looks rather like a stockaded fort with nasturtiums as the stockade. You do still have to watch for the caterpillars as they can decimate a nasturtium for a midmorning snack and be looking around for the next meal. But it does give you a bit of a jump on the caterpillars.
A third option, which we haven't really explored in the garden, is consciously and deliberately to develop a predator population. This would include some of the wasps and assassin bugs. I believe there are probably some birds as well who would be delighted to snack on the butterflies and perhaps the caterpillars.
There is, as usual, a final option, which is not to plant anything they want to eat. This is actually not realistic for several reasons, not the least of which is that we would run out of things to plant! But, more importantly, the butterflies range over kilometers in a day so unless the entire city participated in a Brassicaceae ban....
Aphids...
The aphids I'm seeing at the moment are a blue-grey carpet in the heart of my collards. A determined attack with soapy water will bring them under control in short order (I hope... it did last year and the year before but you never know.) If you haven't done the soapy water thing before, just put a few drops of regular kitchen dish soap (Palmolive seems to be more effective than the 'organic' kinds I buy at the Coop...) with a couple drops of garlic oil (also available at the Coop and probably other places - I think you can also use chili powder or something hot and unpleasant to the skin)... Put the soap and oil in a spray bottle filled with plain water. The whole thing shouldn't be particularly sudsy when you shake it or feel soapy on your hands.
Lady Bugs...
Like the last fairy at Sleeping Beauty's christening gone awry, it's always a relief to know we have lady bugs in the garden. This link (click here) goes to a slightly rambling six minute video showing lady bug eggs that are just beginning to hatch on the side of a pot. While you probably don't need to pay attention for all six minutes. it is a good source for seeing eggs (yellow ones and a whitish-pink set) and for seeing a newly hatched larva. A somewhat longer (30 minutes) and much more professionally put together video - produced by the BBC is, not surprisingly, much more complete. Replete with images of ladybugs mating, laying eggs, growing through their various stages, and eating their prey, the video could easily have an 'explicit content' warning. It does make fascinating viewing though so click here if you're interested in watching.
Cabbage White
Wikipedia, the source of all information, has an entry on this butterfly, also known as the small white (Pieris rapae).
In terms of what concerns us, the butterfly lays her eggs on the underside of Brassicaceae (aka mustards, crucifers, cabbages.) This would mean that anyone with wintered over collards or arugula in the garden should be checking for eggs regularly. Also, anyone who has recently planted seedlings of kale, cabbage, broccoli, collards, Brussels sprouts, etc should definitely be on the watch. According to the Wikipedia link given above (quoting an assortment of scientific articles), the butterflies prefer depositing eggs on isolated plants or on perimeter plants in clusters of plants. They apparently are also aware of the voracious appetites of the caterpillars and lay few rather than many eggs (see below) per leaf although I also saw some imagery on the internet with large clusters of eggs.
 |
| Image by Alpsdake, downloaded from Wikipedia |
If you see the eggs/larvae, the first line of defense is squishing. It appears that soapy water with something spicy - garlic or a hot pepper - will also do serious damage to the larval membrane and/or render the leaves unpalatable to the newly hatched caterpillars.
From my admittedly limited reading, it appears that pesticides aren't particularly effective but there are two strategies that can be implemented to protect your tender plant leaves from being identified as potential nurseries.
First. These butterflies are apparently quite territorial so you can either buy or make small white butterfly shapes and hang them in your row. It's best if they are hung so that they will "flutter in the breeze." I saw one youtube video in which they hung bits of tin foil with the same effect - a breeze appears to be important here as well.
Second. A sacrificial plant. Nasturtiums are considered ideal for this, although personally it makes me rather sad as I'm fond of nasturtiums. But you could plant something that looks rather like a stockaded fort with nasturtiums as the stockade. You do still have to watch for the caterpillars as they can decimate a nasturtium for a midmorning snack and be looking around for the next meal. But it does give you a bit of a jump on the caterpillars.
A third option, which we haven't really explored in the garden, is consciously and deliberately to develop a predator population. This would include some of the wasps and assassin bugs. I believe there are probably some birds as well who would be delighted to snack on the butterflies and perhaps the caterpillars.
There is, as usual, a final option, which is not to plant anything they want to eat. This is actually not realistic for several reasons, not the least of which is that we would run out of things to plant! But, more importantly, the butterflies range over kilometers in a day so unless the entire city participated in a Brassicaceae ban....
Aphids...
The aphids I'm seeing at the moment are a blue-grey carpet in the heart of my collards. A determined attack with soapy water will bring them under control in short order (I hope... it did last year and the year before but you never know.) If you haven't done the soapy water thing before, just put a few drops of regular kitchen dish soap (Palmolive seems to be more effective than the 'organic' kinds I buy at the Coop...) with a couple drops of garlic oil (also available at the Coop and probably other places - I think you can also use chili powder or something hot and unpleasant to the skin)... Put the soap and oil in a spray bottle filled with plain water. The whole thing shouldn't be particularly sudsy when you shake it or feel soapy on your hands.
Lady Bugs...
Like the last fairy at Sleeping Beauty's christening gone awry, it's always a relief to know we have lady bugs in the garden. This link (click here) goes to a slightly rambling six minute video showing lady bug eggs that are just beginning to hatch on the side of a pot. While you probably don't need to pay attention for all six minutes. it is a good source for seeing eggs (yellow ones and a whitish-pink set) and for seeing a newly hatched larva. A somewhat longer (30 minutes) and much more professionally put together video - produced by the BBC is, not surprisingly, much more complete. Replete with images of ladybugs mating, laying eggs, growing through their various stages, and eating their prey, the video could easily have an 'explicit content' warning. It does make fascinating viewing though so click here if you're interested in watching.
Friday, January 30, 2015
It doesn't look like spring to me...
At mid-January 2014, some of our gardeners had snow peas (planted the previous fall) coming up. So, at mid-January 2015, I convinced my long-suffering gardening partner that it was time to plant cool season crops. Really.
Because he's a good sport, he came out with me and we planted snow peas, sugar snap peas, shelling peas, spinach, broccoli (for his dogs), broccoli rabe, lettuce, chard, kale, and carrots. It's been over a week with two brief snows and NO plants have come up yet. I hope I wasn't wrong about this!
So, there's one day left in January but I looked at the Down to Earth calendar for January, thinking that it's never to late to learn what I should have been doing. They say that January is the coldest month in New Mexico. It certainly felt like that yesterday. Low nighttime temperatures in the low 20s. Check. Daytime highs in the upper 40s. Hah! We've beaten that quite a few times and even reached the low 60s once or twice I think. They don't think it's actually time to put out vegetables or too much of anything else. They do recommend getting your tools cleaned, oiled, and sharpened... What was that expression - gentlemen, start your engines...
More seriously, germinating seeds care more about soil temperature than air temperature. Although they will care about air temperature once they poke their leaves above the ground. If you read your seed packets, many will provide information on the required soil temperature and/or the weeks prior to or post frosts. All of the seeds we planted are what are called cool season crops. They tend to be able to go out around a month before the last frost and/or when the soil temperatures are above 40F. Our soil temperatures have been holding pretty steady all winter at about 50F.
The concern, really, with planting this early is when the leaves are up. These particular vegetables can all stand a bit of frost but it will be necessary for me to keep an eye on any night freezes we have coming up and cover the row for the night if necessary. To me, that's a small price to pay to have early vegetables!
Surely it's not fall already... or what to plant for your fall and winter garden
Another repost from the previous blog but good for every fall...
Of course not. But it is time to think about planting late summer vegetables. We generally have enough time to get in a quick round of some of the fast growing cool season crops before the soil chills too much and the frosts are too hard.
The Albuquerque Master Gardener's book, Down to Earth, is available online. Or at least the calendar is.
For August, they recommend planting vegetables like "lettuce, spinach, radishes, carrots, onions, broccoli, snow peas, and turnips for harvest before Christmas." And to think I just pulled out my last snow pea today. Guess I'll be starting over in short order!
As late as September, they suggest that you can put out arugula, chard, garlic, fava beans, and leeks as well as the vegetables listed for planting in August. Planting in September should get you an early spring harvest.
As I recall, some of our gardeners put out garlic even later.
If you're planting seeds for a harvest BEFORE it's too cold, check the seed packet for the days to germination and the days to maturity. Different varieties of the same vegetable may have quite different days to maturity.
According to the Master Gardener website, the official average first frost at the Sunport is on Halloween. As they go on to point out, the average is not the actual. Even if the temperatures dip for a night or two, our garden is relatively protected and you can cover plants for some protection.
So, if you wanted to grow a vegetable that germinated in a week and matured in 45 days, you'd want to plant about one and 3/4 months BEFORE 31 October or in early September. Planting too soon risks having your seedlings fry in a heat they don't like. On the other hand, plants being pretty smart about that sort of thing, you might find that even if you plant a bit early, the germination will be slow.
Planting vegetables in the fall to get a jump on spring gardening is very tempting. I should know. I now seem to have perennial collards in my row. And the gardeners of row 13, as I recall, had snow pea plants poking out of the ground in mid-January this year. How cool is that?
On the other hand, giving back to the soil by putting in a cover crop that can be cut and mulched in the spring is a good thing to do. As is simply giving your row a nice thick blanket of mulch and compost for the winter.
No squash in 2015 because we didn't squish the squash bugs in 2014....
This post is copied in from our previous blog and was originally posted on 9 August 2014. We won't have any squash, melons, or cucumbers in 2015 although we will plant one sentinel/sacrificial squash to determine the extent of our problems for this season.
Many people refuse to grow squash because the squash bugs always win. I have now lost winter squash two years running to these ... ehmmm.... pests. People in the garden with me can always tell when I've found a new set by the profanities I mutter. I'm not a fan of squash bugs and, truthfully, for our community garden, I think we need to have a bit of a break from squash. I wouldn't go so far as to say the bugs have won but they've certainly woRn me down.
I don't know why but they seem especially fond of winter squash. I don't think any of our gardeners had summer squash this year so perhaps they were forced to eat winter squash. But last year (2013), there was a spectacular zucchini with a healthy population of squash bugs that produced prolifically anyway. The squash, I mean, although the bugs probably reproduced prolifically as well. "Squash bugs, paaahhh!", that plant seemed to say, with a defiant toss of its head.
 But this year (2014)... We have only winter squash. And, we didn't have a 'bug patrol.' Everyone, I think, knows what the eggs look like. And the adults. But, here's what a totally destroyed plant looks like. Each LEAF sported on the order of 50 or more bugs. It was a sad and sobering sight. As I sprayed soapy water on the bugs they dropped to the ground and hurried off. They know me now and I can't get close to them any more - they scurry from one to the other side of the leaf - it's rather like playing hide and seek... with pretty high stakes for them. I suspect that soapy water has somewhere between limited and no effect on the adults but I'm hoping it kills the nymphs... I don't like to think that I'm a rabid bug hater and go around killing bugs indiscriminately but our squash bugs appear to have no predators who can keep up with their exploding population other than, well, me.
The worst part, though, was watching the bugs disperse through the mulch, knowing that they can (and no doubt will) winter over and be ready for any squash that we might dare to plant next spring. I sadly watched about twenty of them burrow under the mulch to find a new, safer home for the winter. I hope we'll be ready next spring!
Many people refuse to grow squash because the squash bugs always win. I have now lost winter squash two years running to these ... ehmmm.... pests. People in the garden with me can always tell when I've found a new set by the profanities I mutter. I'm not a fan of squash bugs and, truthfully, for our community garden, I think we need to have a bit of a break from squash. I wouldn't go so far as to say the bugs have won but they've certainly woRn me down.
I don't know why but they seem especially fond of winter squash. I don't think any of our gardeners had summer squash this year so perhaps they were forced to eat winter squash. But last year (2013), there was a spectacular zucchini with a healthy population of squash bugs that produced prolifically anyway. The squash, I mean, although the bugs probably reproduced prolifically as well. "Squash bugs, paaahhh!", that plant seemed to say, with a defiant toss of its head.
The worst part, though, was watching the bugs disperse through the mulch, knowing that they can (and no doubt will) winter over and be ready for any squash that we might dare to plant next spring. I sadly watched about twenty of them burrow under the mulch to find a new, safer home for the winter. I hope we'll be ready next spring!
First 2014 "Tasting in the Garden" (originally posted on 26 July 2014)
Where to start... Adjectives would be wonderful, fabulous, awesome ... and could only become more superlative from there.
About 10 rows were represented in the feast.
We had a lovely flat bean reminiscent of an Italian flat bean but Spanish. Two different types of chard wraps - one filled with mozzarella cheese, basil and tomatoes and roasted on the grill; one stuffed with rice, sushi style. We harvested a pineapple tomato and sliced it. It was large enough that everyone had a good sized and delicious sample. Although I have tons of collards in my row, I didn't prepare anything from them but luckily someone from another row prepared a most tasty dish. There was a rhubarb crumble, beet salad, whitefish spread (not from the garden but maybe we could have a pond next year????) served with basil and cherry tomatoes from the garden. Grilled, smoked sausage, Jalapeno poppers wrapped in bacon. (Bacon and sausage also not from the garden .... maybe we should just have a farm...) Quinoa salad with mango. Although the quinoa wasn't from the garden, one row has some nearing harvest and we're all looking forward to tasting some home-grown soon. Fresh grapes. And the samplers I made and brought: a feta-herb dip, an unripe stone fruit chutney, and a plum compote. And dried tomatoes from 2013. I'm sure I've forgotten something.
It was a veritable feast as well as an amazing demonstration of what can be done with simple garden produce.
Wednesday, January 28, 2015
Plant rotation in the community garden
A caveat, of course, to begin. This post (which is copied in here from the former blog at my website) focuses on a specific, small area of a particular community garden. The topic of plant/crop rotation is often found in farming, not community gardening, literature. And, there are those who would argue that this is way beyond overkill for our garden. So, if you don't belong to this latter group, then forge ahead, intrepid reader...
Many rotation plans call for three year cycling: year 1 plant, years 2 and 3 fallow to that crop, year 4 plant. I think this does a lot towards getting rid of pests for that specific crop/crop family. I imagine that during year 1 the pest moves in and sets up housekeeping big time (if you're not using pesticides). The pest 'overwinters' in any form from egg to adult and is ready to go come spring and your tender new plants. But, you have wisely fooled that pest by not providing luxury accommodations in year 2... Still, a hungry pest will generally make do with what it can find and might survive well enough to overwinter yet again albeit with a smaller population for the spring of year 3... And now, the famine is serious, and the pest effectively dies out. Or at least moves on to someone else's garden... And so, in year 4, you can begin the cycle again.
The happy scenario I have imagined above (which theoretically gets you a good harvest of a particular crop family every 3 years) doesn't address the extent to which a crop has to be removed. I don't know the answer because a lot of what I've read refers to crops and fields so the plant would be completely gone during the intervening years. In the smaller garden space where crop diversification is the rule (especially with 20 or so gardeners on about an eighth of an acre), I suspect that the 'infestations' are not likely to be of the magnitude seen in acres of field planted in a single variety of one plant.
And, I don't know how far is far enough for a hungry pest. Is 'further down the row a piece' or 'the row next door' far enough, or does there need to be an intervening row (or two or three) maybe with some specific plant the pest really hates in there? I don't know but our experience with squash bugs this year does suggest that the pest situation can get out of control relatively quickly. The bugs reproduced themselves with discouraging success, moved widely throughout the garden when their host plants were removed, and were willing to settle for cucumbers and melons when squash were unavailable.
Thus far I've focused on above-ground pests, largely because we've had so many this year. But there are other benefits to plant rotation. The rest of this post summarizes the information provided in an article I found online. (Click on the word article in the previous sentence to go to the link - it should appear as a purple underlined text but you never know...)
This article cites (without references but I’m sure they can be found relatively easily) a number of studies of crop rotation suggesting that productivity falls off rapidly when the same crop is planted in successive years. One factor is the ‘nitrogen fixing’ (which is really about mycorrhizal fungi) and another factor is disruption of pests and other pathogens. And the article mentions other things that just seem weird to me. Like both snap beans and potatoes should be planted following corn to improve production.
Although the research is for farms, the article argues that even when pulling up plants in a home garden at the end of the season, we never can get all the roots so that pests and pathogens will remain. Thus, even small scale ‘crops’ can benefit from rotation. I've addressed above-ground pests extensively because you can see them and so you know what the problem is when your plant is unhappy. I don't really know anything about the fungal diseases and viruses that always seem to mysteriously discolor, wilt and dry plants. But the pathogen will often remain in the soil in an anthropomorphic way similar to the one I imagined for the bugs. So, I think the same sort of temporal and spacial rotation scenario can be imagined. The only difference I can think of would be that the fungal diseases really are going to be more localized than pests that can sort of 'vote with their feet' (i.e., move).
With the fungal diseases, though, the question of disposal of the diseased plant becomes important. The material should be carefully removed and never, never, never put in the compost... Think CDC and infectious diseases for your plants.
The article also provides an 8-crop rotation plan as well as a listing of nine ‘families’ to help rotate among different families and not merely different plants, some of which might have the same or similar susceptibilities.
Subscribe to:
Posts (Atom)